The precision of medical equipment accessories directly determines the safety, reliability, and therapeutic effect of medical devices. From surgical robot joints to medical imaging equipment components, precision requirements generally meet the micron-level (μm) standard. Relying on digital control, multi-axis synchronization, and precision testing technologies, CNC machining has become the core process to meet such stringent requirements. Its value lies not only in the accuracy of machining dimensions but also in the comprehensive optimization of geometric tolerances and surface quality through full-process control, providing technical support for the manufacturing of high-end medical devices.
Starting from the three core precision dimensions of medical accessories, this article analyzes the key implementation paths of CNC machining in equipment selection, process design, and quality control, and demonstrates how it converts the theoretical precision of design drawings into the reliable performance of actual products.
Three Core Precision Requirements for Medical Equipment Accessories
Dimensional Precision: From Millimeter-Level to Micron-Level
The dimensional precision requirements for medical accessories far exceed those of ordinary industrial parts:
– Basic dimension control: Conventional surgical instruments (such as surgical forceps joints) require a dimensional tolerance of ≤±0.05mm, while implantable medical devices (such as artificial joint prostheses) need to meet a tolerance of within ±0.01mm—equivalent to 1/10 the diameter of a human hair.
– Fitting precision optimization: Precision transmission components (such as rotating bearings in CT equipment) require a fitting clearance of ≤5μm to ensure low vibration and long service life during operation, and prevent abnormal equipment operation caused by dimensional deviations.
Geometric Tolerances: A Stringent Test of Geometric Precision
Geometric tolerances determine the spatial geometric relationship of accessories and are crucial to the stability of medical equipment:
– Straightness and flatness: The straightness of medical catheter stents requires ≤0.02mm/m to ensure precise positioning during interventional surgery; the flatness of the gradient coil substrate in MRI equipment must be controlled within ±10μm to avoid uneven magnetic field distribution affecting imaging quality.
– Coaxiality and perpendicularity: The coaxiality of the joint axis of surgical robot arms is ≤0.01mm to ensure the coordinated precision of multi-axis movement, while the perpendicularity deviation of the implantation part of dental implants must be <0.5° to ensure biomechanical adaptation to bones.
Surface Roughness: An Invisible Threshold for Microscopic Quality
Surface roughness directly affects the functionality and biocompatibility of medical accessories:
– Functional surfaces: The surface roughness of syringe plungers (Ra) is ≤0.2μm to reduce drug residue and wear; the threaded surface of orthopedic implants needs to reach Ra ≤0.4μm to lower the risk of tissue compatibility issues.
– Special treatment requirements: Accessories in contact with the human body often require mirror finishing (Ra ≤0.1μm), combined with subsequent coating processes (such as hydroxyapatite coating) to improve bioactivity and corrosion resistance.
Four Core Technical Paths for CNC Machining to Achieve High Precision
Equipment Selection: Precision Hardware Lays the Foundation for Machining
The precision level of CNC machining equipment determines the boundary of machining capabilities:
– Multi-axis synchronization capability: 5-axis CNC machine tools, through the coordination of X/Y/Z linear axes and A/C rotational axes (positioning accuracy ≤±0.005mm), can machine complex curved surfaces (such as the bionic curvature of joint prostheses) and avoid tool connection errors of traditional 3-axis machine tools.
– Temperature compensation technology: High-end machine tools are equipped with thermal deformation compensation systems (precision drift ≤5μm when temperature fluctuates by ±1℃) to solve dimensional deviation problems caused by mechanical heat generation during long-term machining.
– Vibration suppression design: Marble bases and air vibration isolation devices control machining vibration below 5μm, making them suitable for machining vibration-sensitive accessories such as optical lenses and ultrasonic probes.
Process Design: Accurate Mapping from Drawings to Machining
Scientific process planning is a key bridge to achieve precision:
– Tool path optimization: The adoption of trochoidal milling and high-speed machining (HSM) technologies controls the cutting vibration amplitude within 10μm, avoiding surface chatter marks caused by traditional tool paths.
– Innovation in clamping solutions: Vacuum adsorption fixtures (positioning accuracy ≤±2μm) solve the clamping deformation problem of thin-walled parts (such as medical catheters), while magnetic chucks are suitable for non-damaging clamping of stainless steel accessories. Meanwhile, Sheet automatic loading robots are integrated into the process flow for sheet-like medical accessories (such as MRI gradient coil substrates and surgical instrument panels)—these robots feature precision positioning modules (repeating positioning accuracy ≤±3μm) to realize automatic, uniform-force feeding of raw material sheets, avoiding manual loading errors (which can reach 15-20μm) and ensuring consistent initial positioning accuracy for each workpiece.
– Machining allowance allocation strategy: Rough machining reserves 0.5-1mm of allowance, semi-finishing reduces it to 0.1-0.2mm, and finishing uses micro-cutting (cutting depth ≤0.05mm) to gradually approach the target precision.
Testing Technology: Full-Process Closed-Loop Control
High-precision testing is the final line of defense for precision assurance:
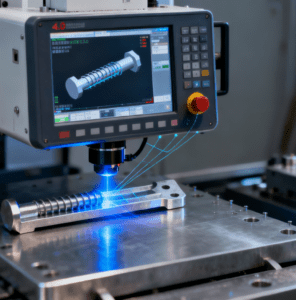
– On-machine measurement systems: Built-in probes in machine tools perform real-time calibration during machining (detection accuracy ±2μm) to instantly correct deviations caused by tool wear.
– Coordinate Measuring Machine (CMM): After machining, CMM equipment with 0.001mm-level precision is used for 3D data collection of complex curved surfaces to ensure geometric tolerances meet design requirements.
– Surface roughness testers: Non-contact measurement (such as laser scattering method) can achieve precision up to 0.01μm, meeting the microscopic quality testing needs of medical accessories.
Materials and Environment: Invisible Support for Precision Achievement
The coordination of machining factors determines the upper limit of precision:
– Material adaptation: For the machining of titanium alloys (such as Ti-6Al-4V), diamond-coated tools (wear rate ≤5μm/h) must be used to avoid surface defects caused by tool adhesion.
– Environmental control: Constant-temperature workshops (20±0.5℃) and cleanliness levels (ISO 8 class) ensure that the machining process is not affected by temperature, humidity, or dust—especially suitable for the machining of neurosurgical micro-instruments.
– Data traceability: The MES system records equipment parameters, tool life, and testing data for each batch of machining, forming a complete precision control file to facilitate traceability of quality issues.
Common Principles of Industry Practices for Precision Assurance
Integrated Collaboration of Design-Machining-Testing
The achievement of high precision for medical accessories relies on digital connection throughout the entire process:
– CAD models are directly imported into the CNC system to avoid manual programming errors (e.g., STL file conversion accuracy ≥99.9%).
– Testing data reversely optimizes machining parameters, forming a “design-machining-correction” closed loop, which increases the precision qualification rate from 85% (traditional processes) to over 99%.
Dynamic Tolerance Management Strategy
Hierarchical control is adopted based on precision requirements for different application scenarios:
– Strict tolerances (±0.005mm) are implemented for key fitting parts (such as threaded connections), while non-force-bearing parts (such as housing decorative components) have appropriately relaxed tolerances (±0.1mm) to optimize manufacturing costs while ensuring functionality.
– Material properties (such as the thermal expansion coefficient of plastic accessories) are considered, and tolerance compensation algorithms (such as temperature-dimension mapping models) are used to improve precision stability in actual use.
Trend of Intelligent Machining
AI technology is becoming a new driving force for precision improvement:
– Machine learning predicts tool wear (prediction accuracy ≥90%) and triggers tool change commands in advance to avoid the deterioration of machining precision.
– Digital twin technology simulates the machining process (error prediction ≤3μm), optimizes process parameters in a virtual environment, and reduces the trial-and-error cost of actual machining.
CNC Machining Reshapes the Standards of Medical Precision Manufacturing
The high-precision requirements for medical equipment accessories are essentially a test of the systematic capabilities of machining technology. Through the in-depth integration of hardware precision, process innovation, and testing technology, CNC machining not only meets the precision leap from millimeter-level to micron-level but also builds a full-process precision assurance system from design to delivery.
Amid the trend of intelligence and miniaturization of medical devices, CNC machining is moving from “meeting precision” to “creating precision”—through technological upgrades such as 5-axis synchronization, thermal compensation, and AI testing, it continuously breaks through the precision boundaries of medical accessories and provides key support for the localization of high-end medical devices. For manufacturing enterprises, focusing on the core elements of precision control and establishing collaborative advantages in “equipment-process-testing” will become a key path to building competitiveness in the field of medical precision machining.


